How to deploy website for free using GitHub
Various people face challenges to discover a free platform for website deployment. In this blog, we'll see the process of hosting a website using GitHub. Through GitHub, you can exhibit open-source systems, host a blog, or even share your resume.

Pre-requisite
1. Git and GitHub Basic Understanding and Commands
2. GitHub Account
3. Developed Website using HTML, CSS, JavaScript
Note: GitHub Pages completely supports the deployment of static websites. It indicates you can deploy just static websites on GitHub Pages.
What is GitHub Pages?
There are several techniques to deploy a website to the public network (Internet). In this case, we will utilize GitHub's free service known as GitHub Pages. GitHub Pages functions as a static site hosting service, directly taking HTML, CSS, and JavaScript files from a repository on GitHub.
Why GitHub Pages?
GitHub Pages approaches a lot of features and flexibility, all for free. Few of the advantages include:
1. Simple Setup
2. Continuous collaboration using Git and GitHub
3. Free hosting with > 99% uptime
4. Live updating with regular GitHub workflow
What is Deploying?
Deployment involves transferring changes or updates from one deployment environment to another. When creating a website, the main live environment, also known as the production environment, hosts the live website available to end users. This blog will detail the procedure of publication changes from the local environment to the production environment, where users can open our website.
Deployment on GitHub Pages
Deploying a website to GitHub Pages is an automatic activity. Once you've done with the setup on GitHub Pages, deployment happens automatically each time you push your local modifications to your GitHub remote repositories. Let's go through the step-by-step procedure to set up GitHub Pages.
Step 1: Visit the official GitHub website in your Chrome or any browser. Upon redirection to the GitHub website, a screen will appear the interface displayed below.

As you can see there are two buttons in the over image are sign in and sign up. If you have previously an account, then just do the login else create an account by simply clicking on sign up button.
Step 2: After login or account creation you can see a dashboard page on your pc screen find and click new button.
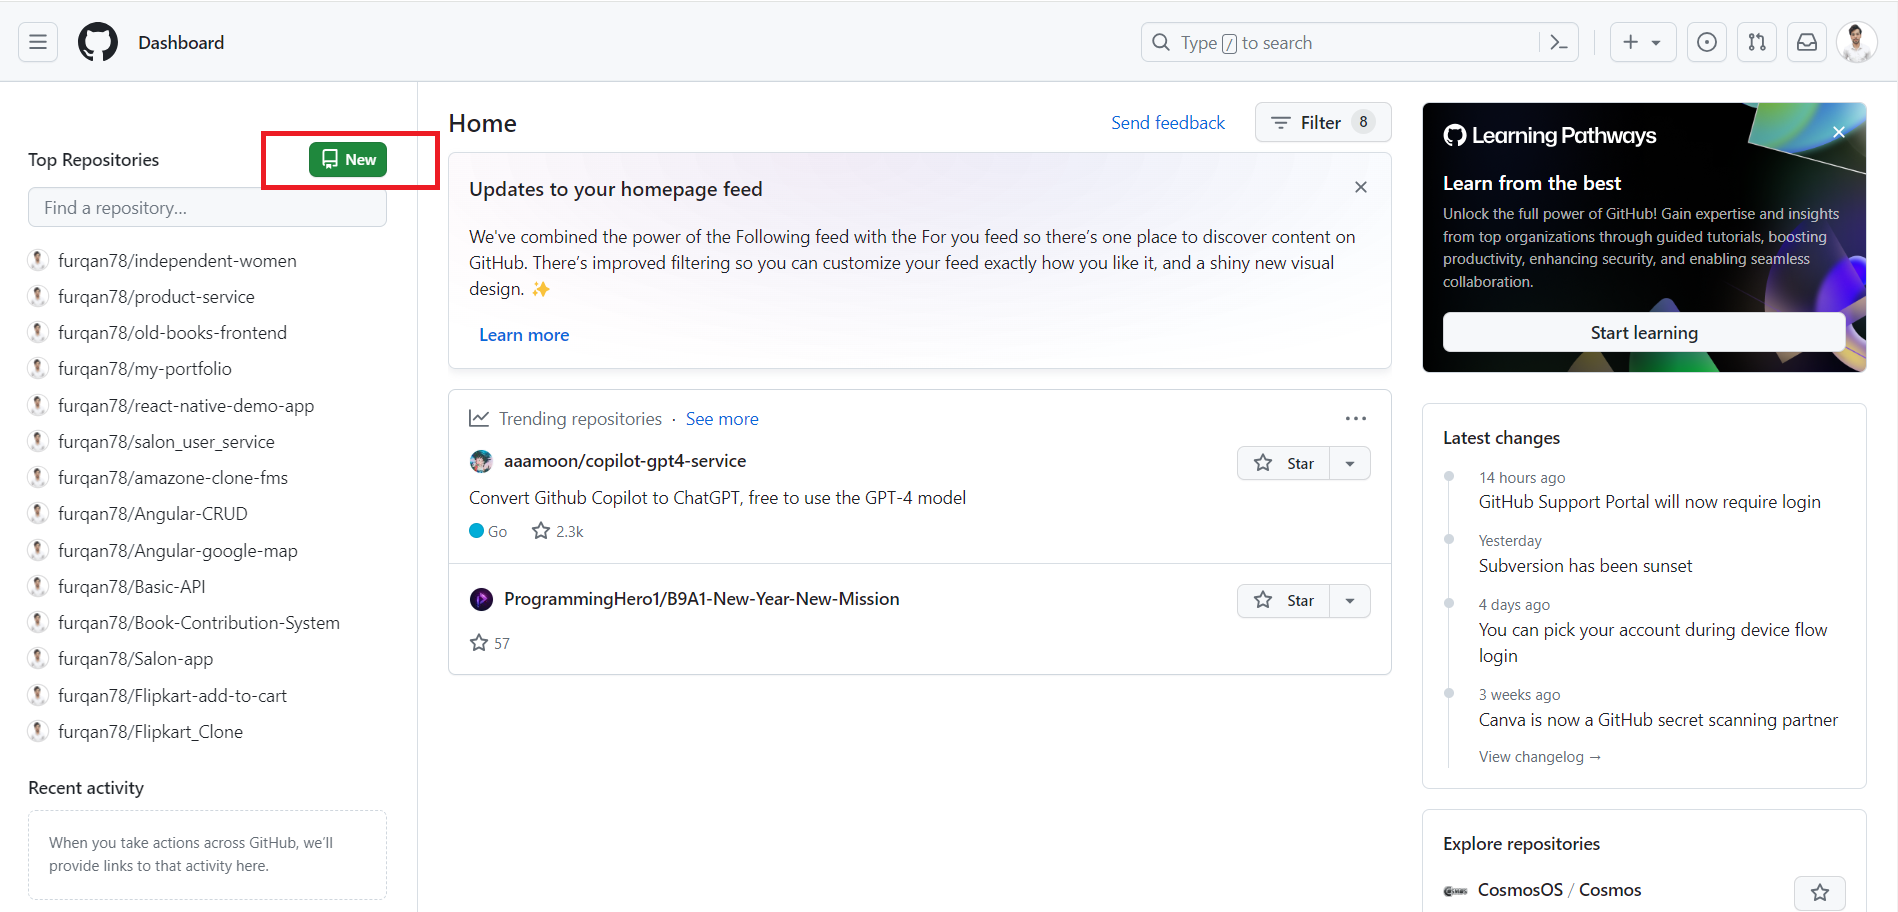
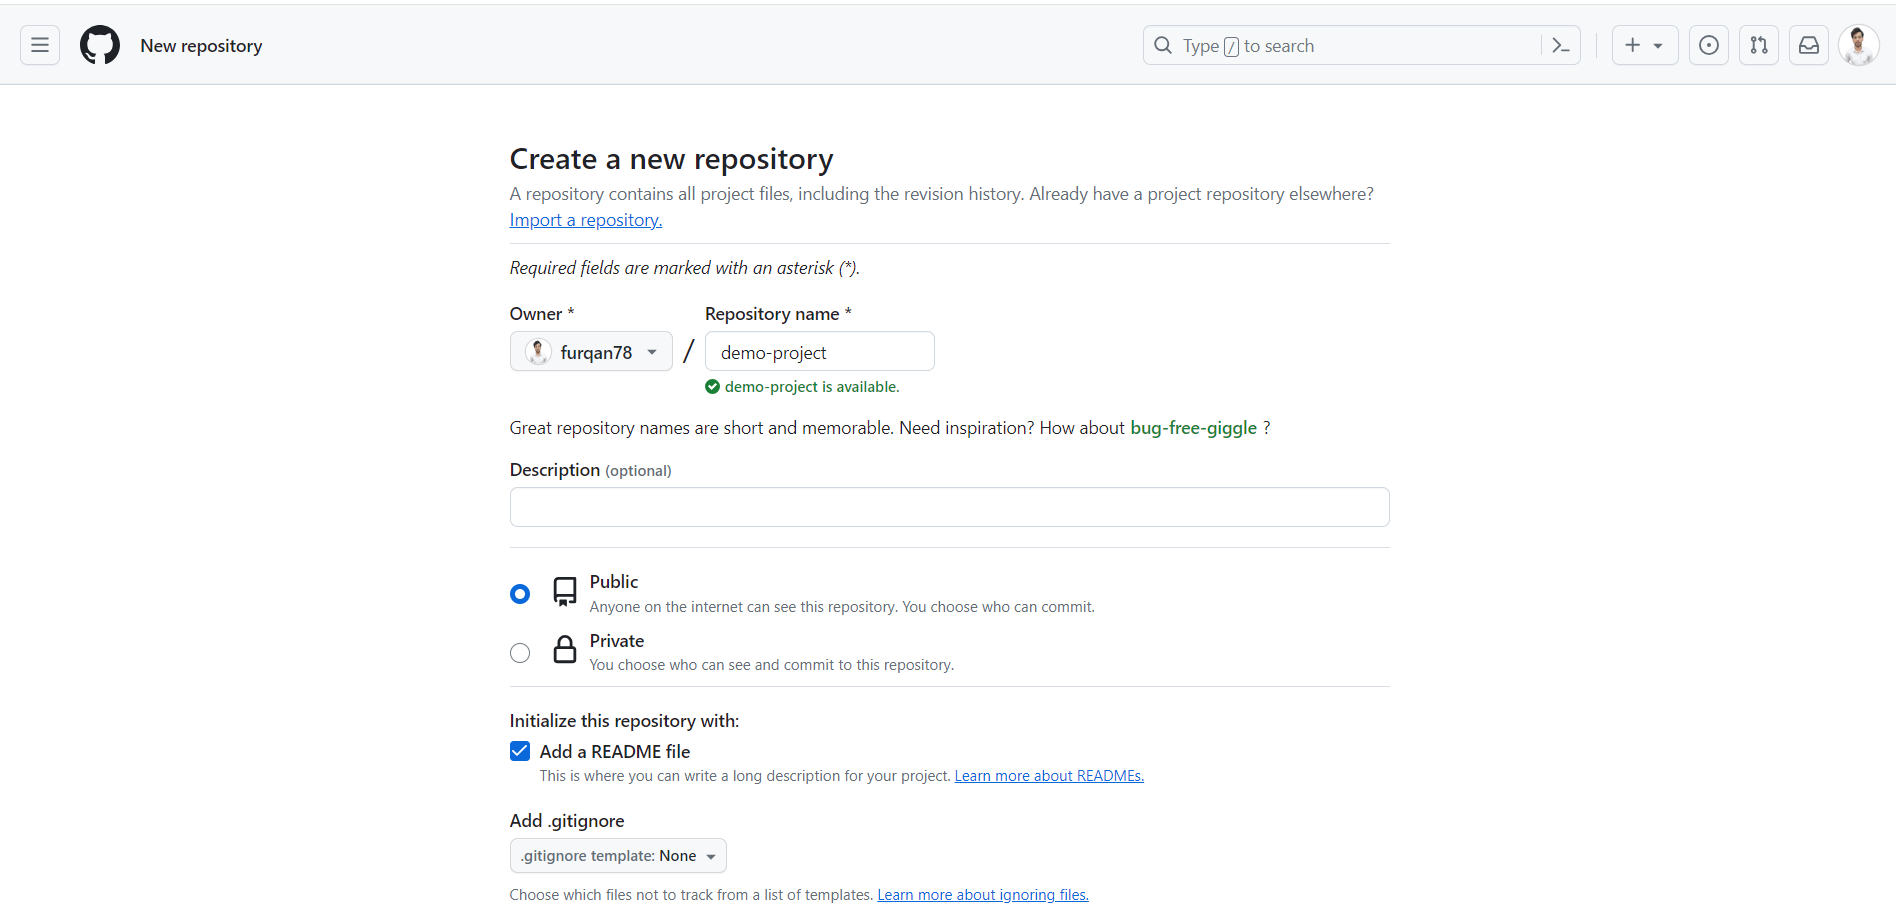
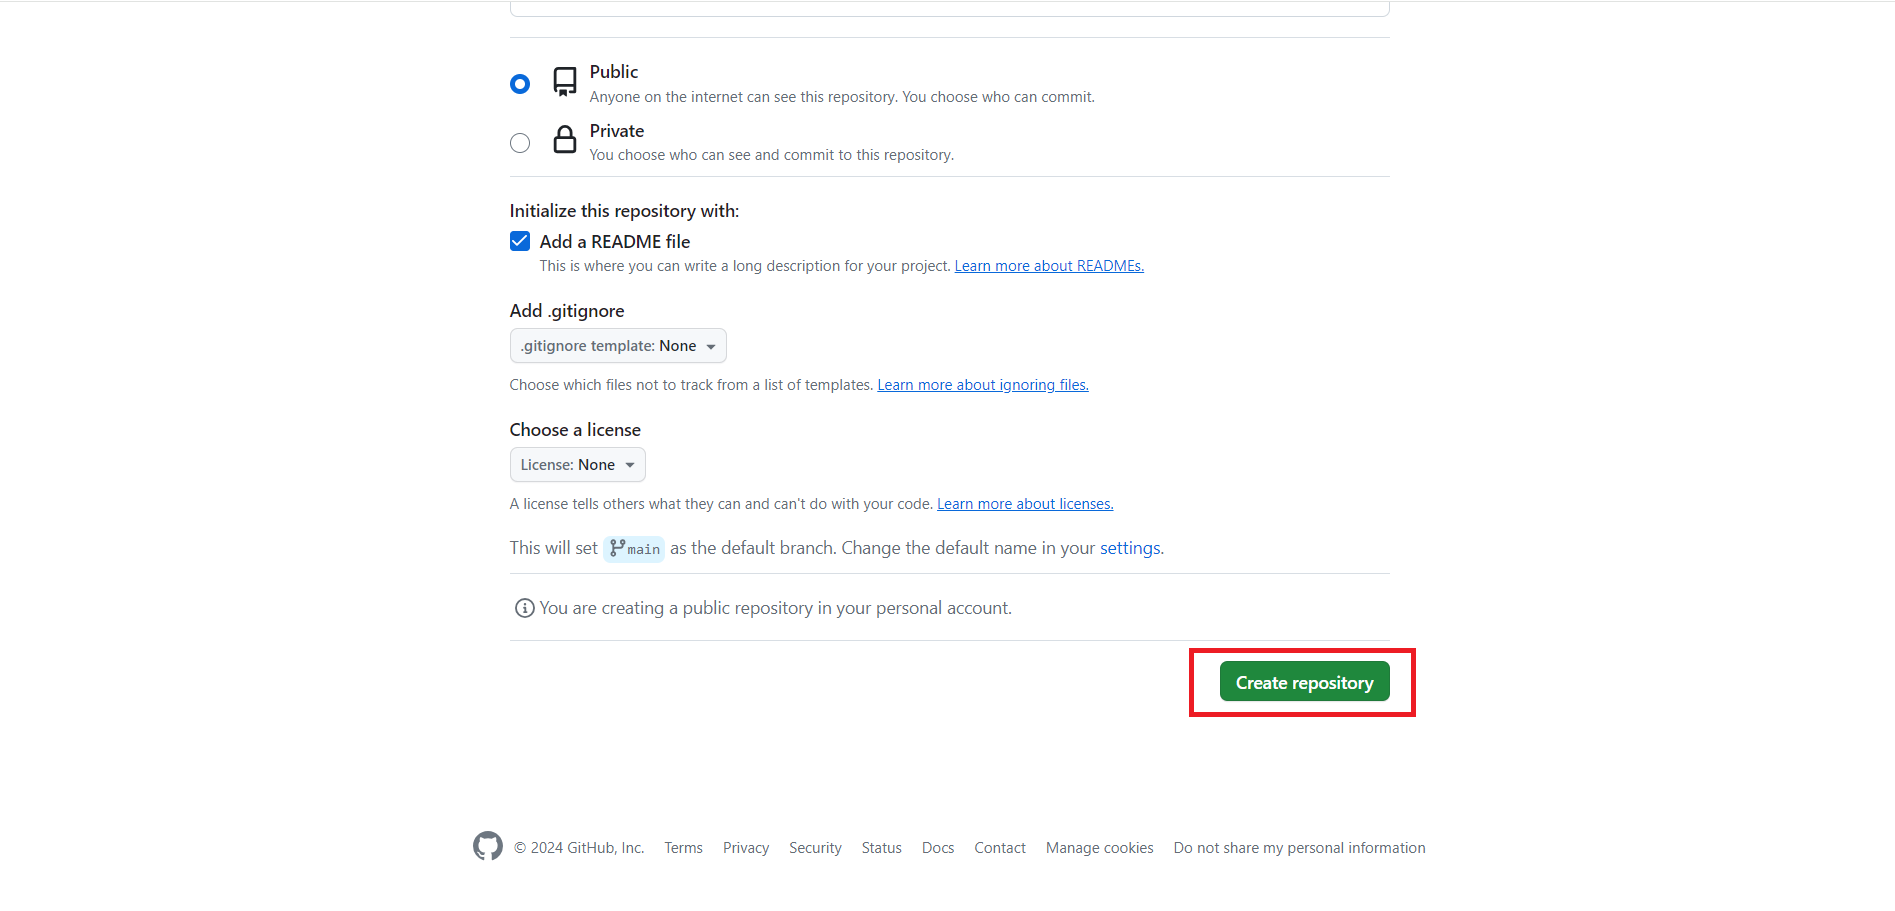
Step 3: Clicking on the 'New' button will trigger the creation of a new repository, running to a screen where you'll require to input specific details. Enter the repository name and an possible description. Choose the 'Public' radio button, accepting anyone on the internet to view the repository, and make sure to mark the 'Add a README file' checkbox. Now, click on 'Create repository' to proceed.
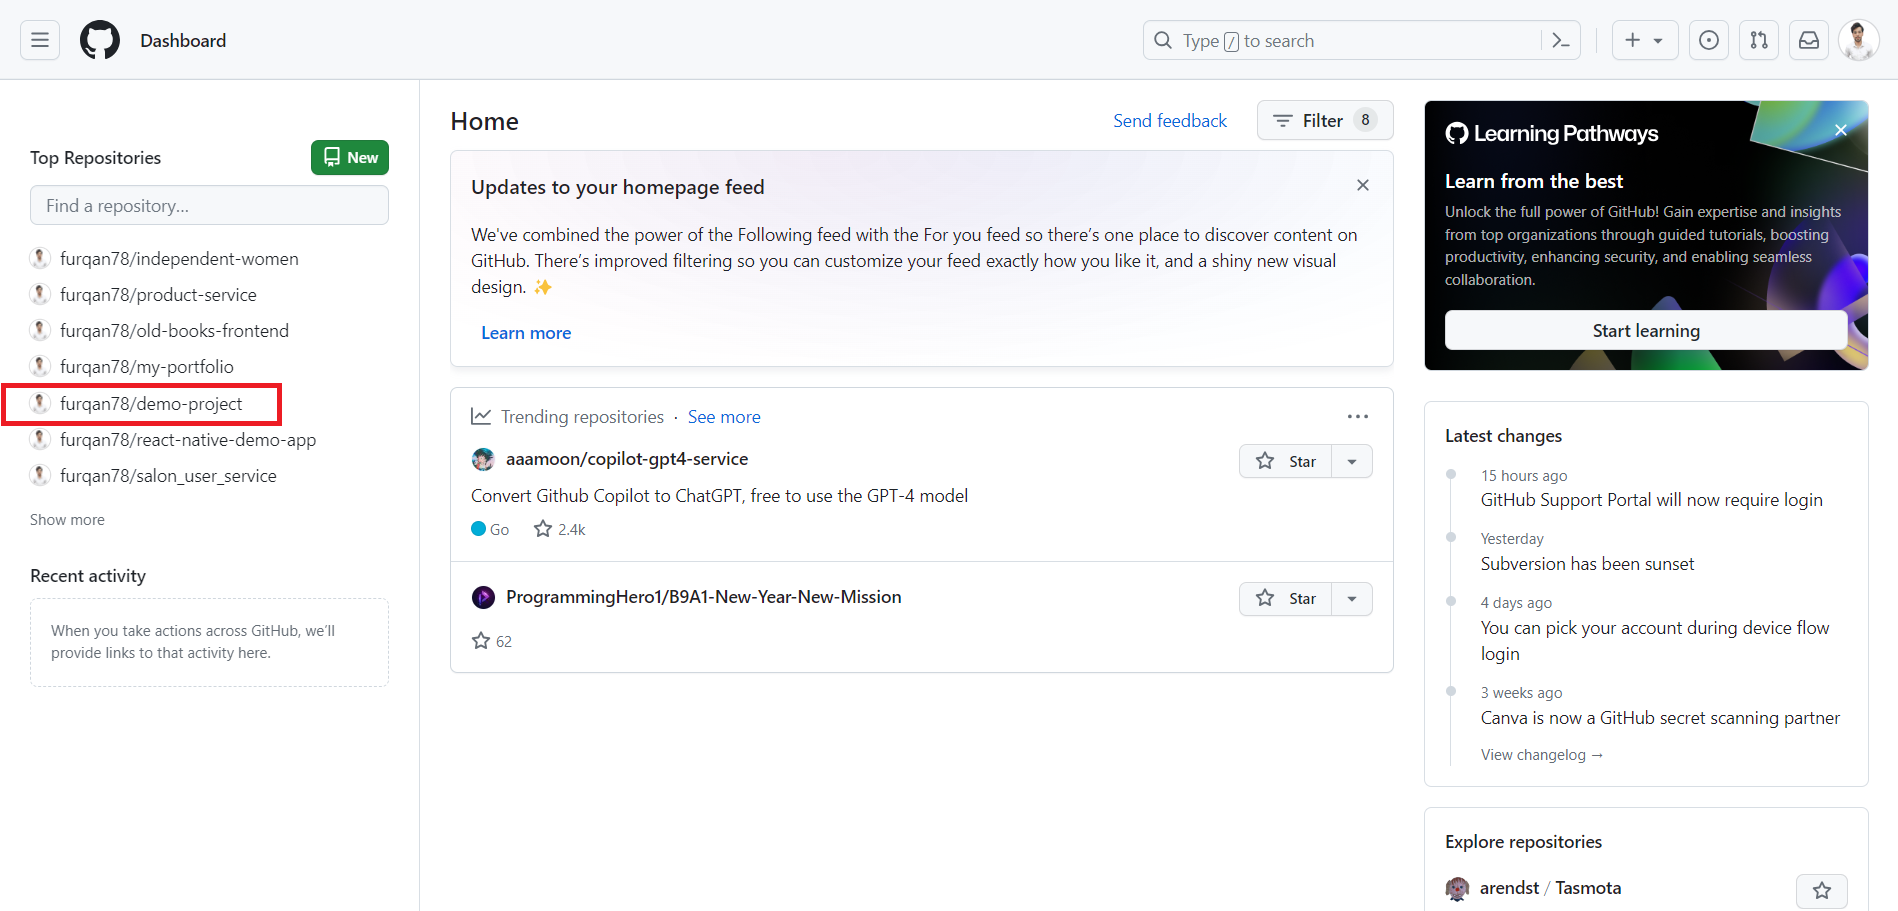
After establishing the repository, you'll locate it displayed on the dashboard screen. In this case, I've used 'demo-project' as the repository name, as displayed in the image below. Click on the 'demo-project' repository to open it.
After clicking on 'demo-project,' you'll get the branches of the repository. Continue by clicking on the 'Add file' button, then select 'Upload files.' Upload all the web pages of your website, confirming that the index.html file should be placed in the root folder.
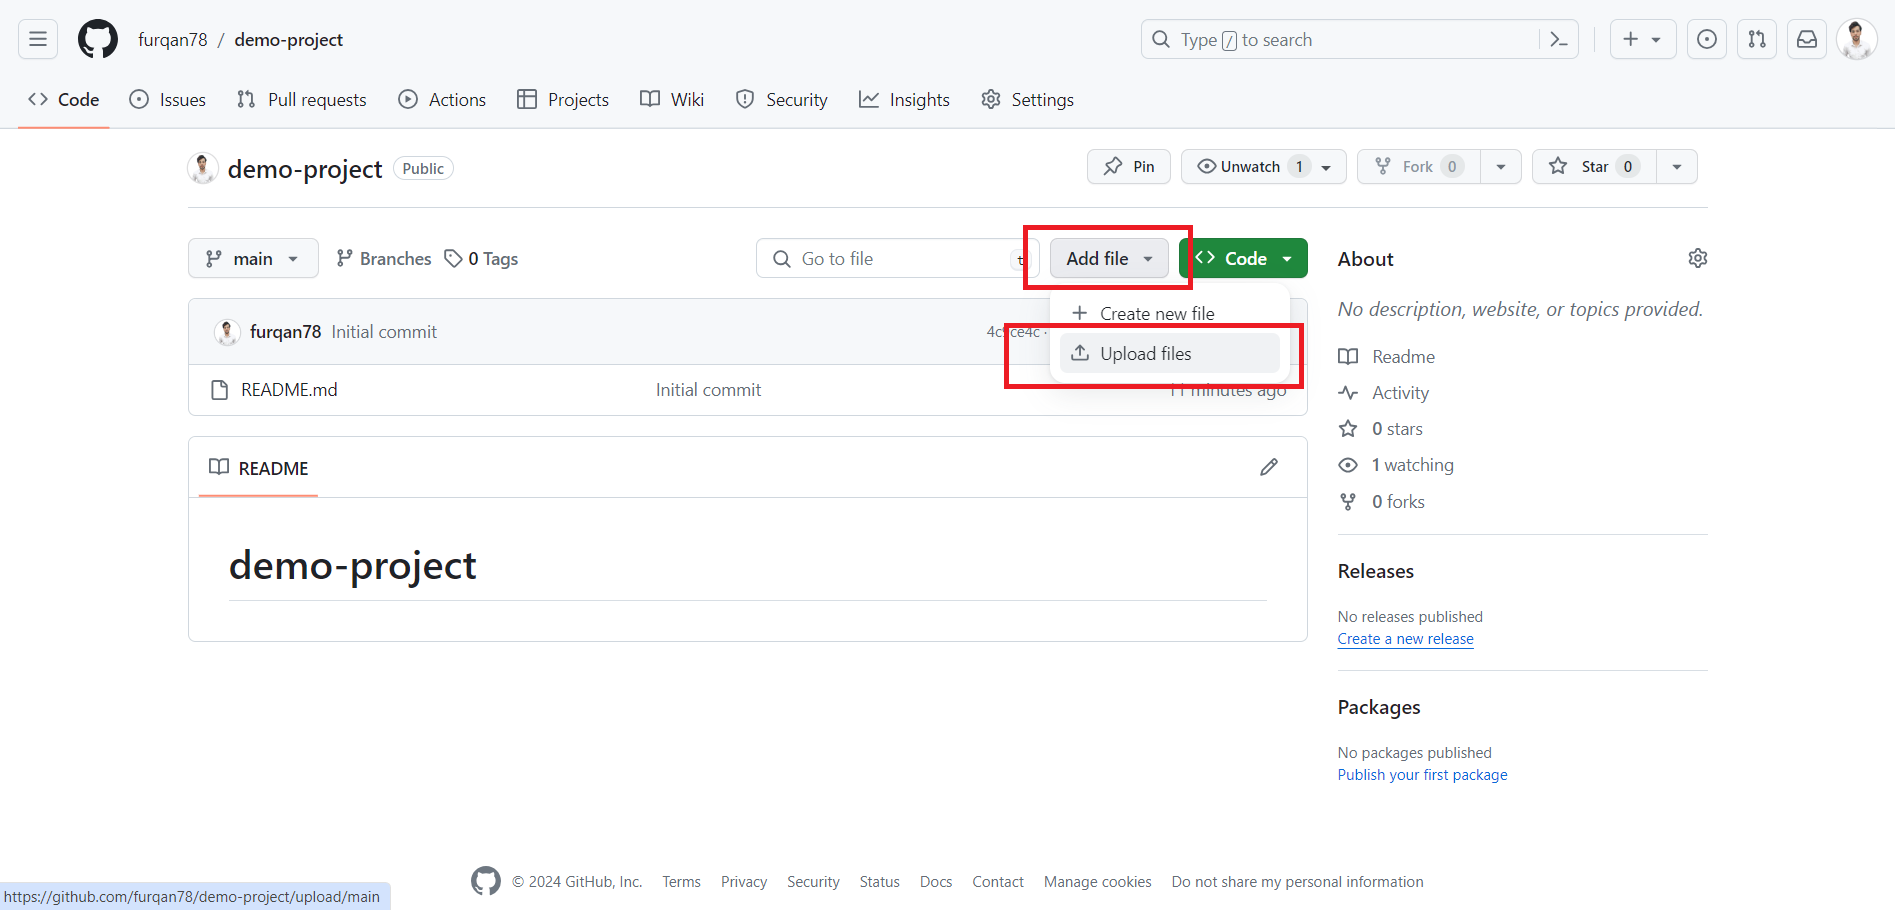
After a successful file upload, your project will seem as displayed below, now click on settings tab.
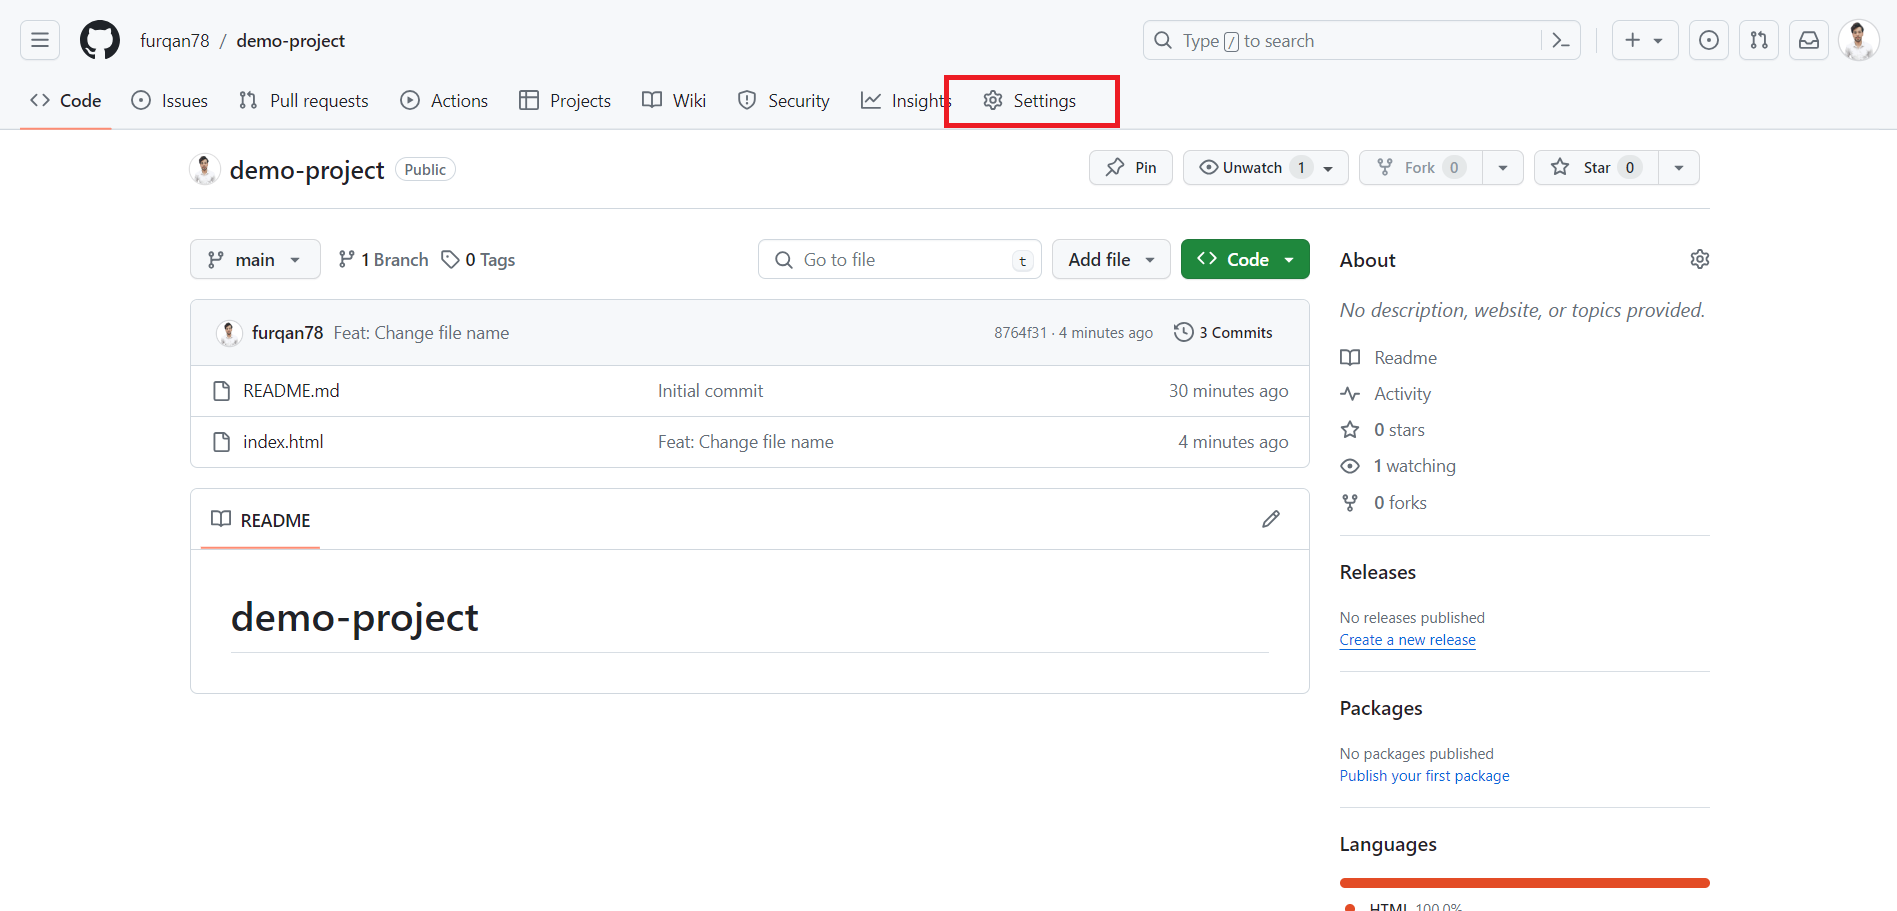
Step 4: After being redirected to the settings page, direct to the 'Pages' section.
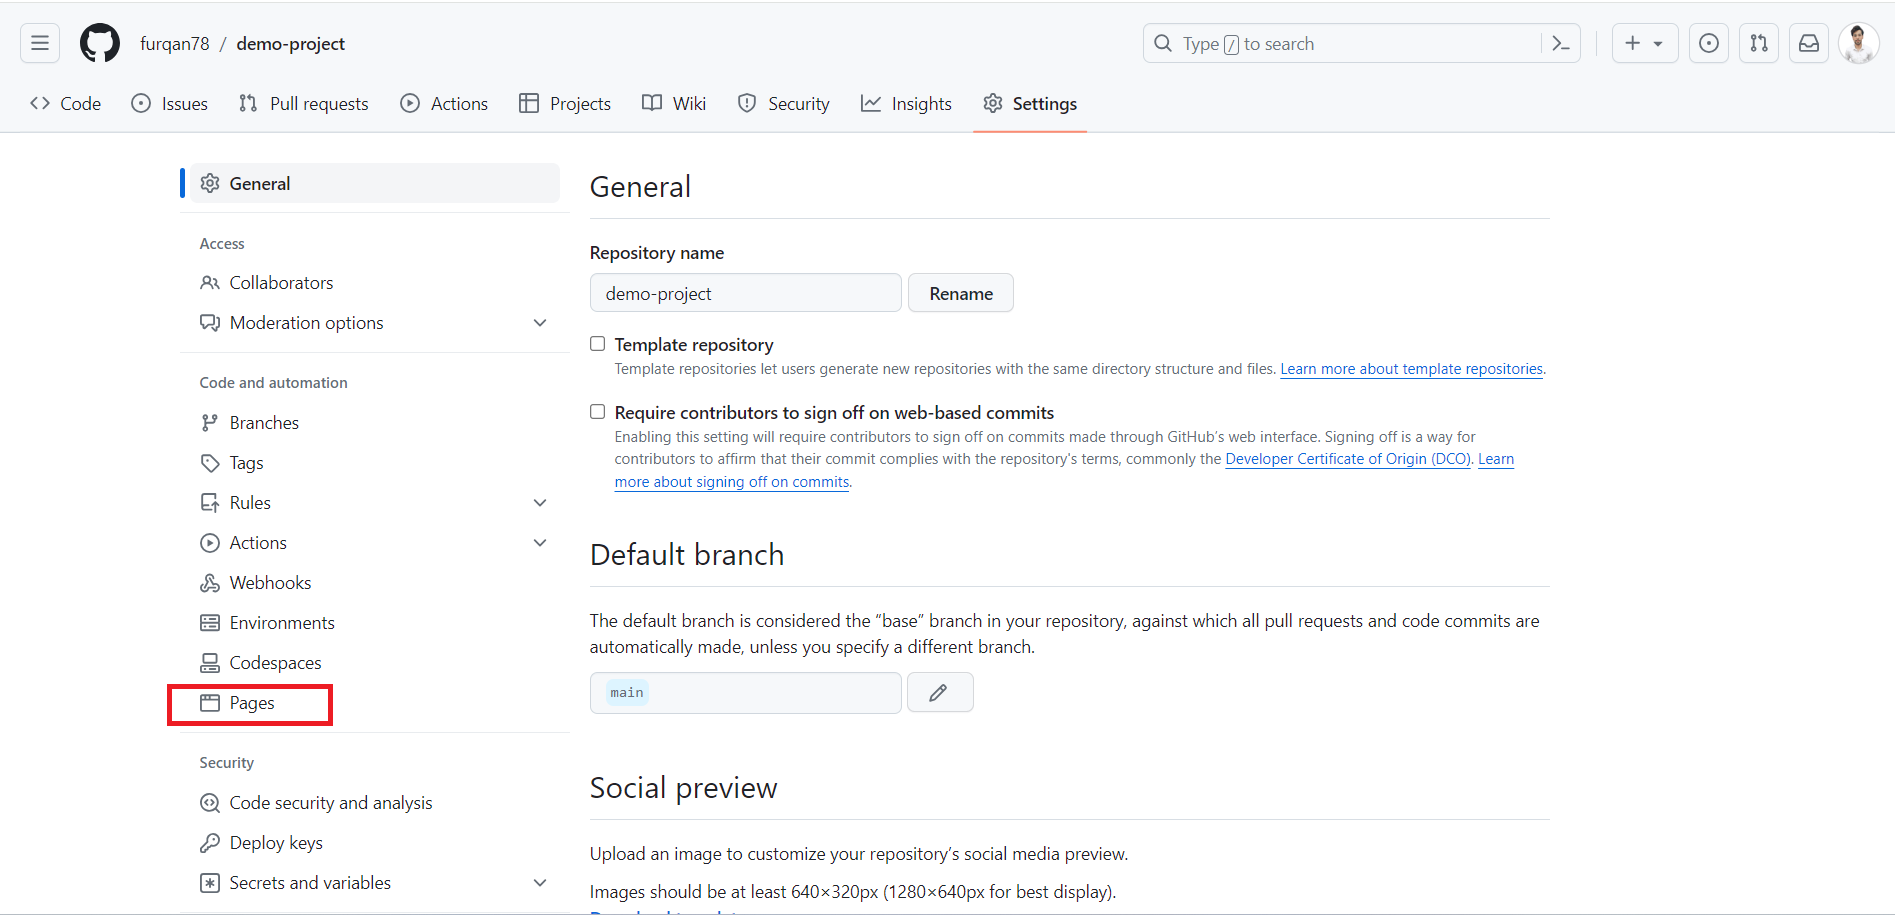
Next, select the 'main' branch from the branch dropdown and then click on the 'Save' button. Following this, you'll need to wait for around 1 to 2 minutes as GitHub Pages will automatically start the build and deployment of your website. It will produce a domain URL that you can use to open your website."
Refresh your screen after 2 minutes a domain URL will display on the screen as in image below. Click on Visit Site to open your website.
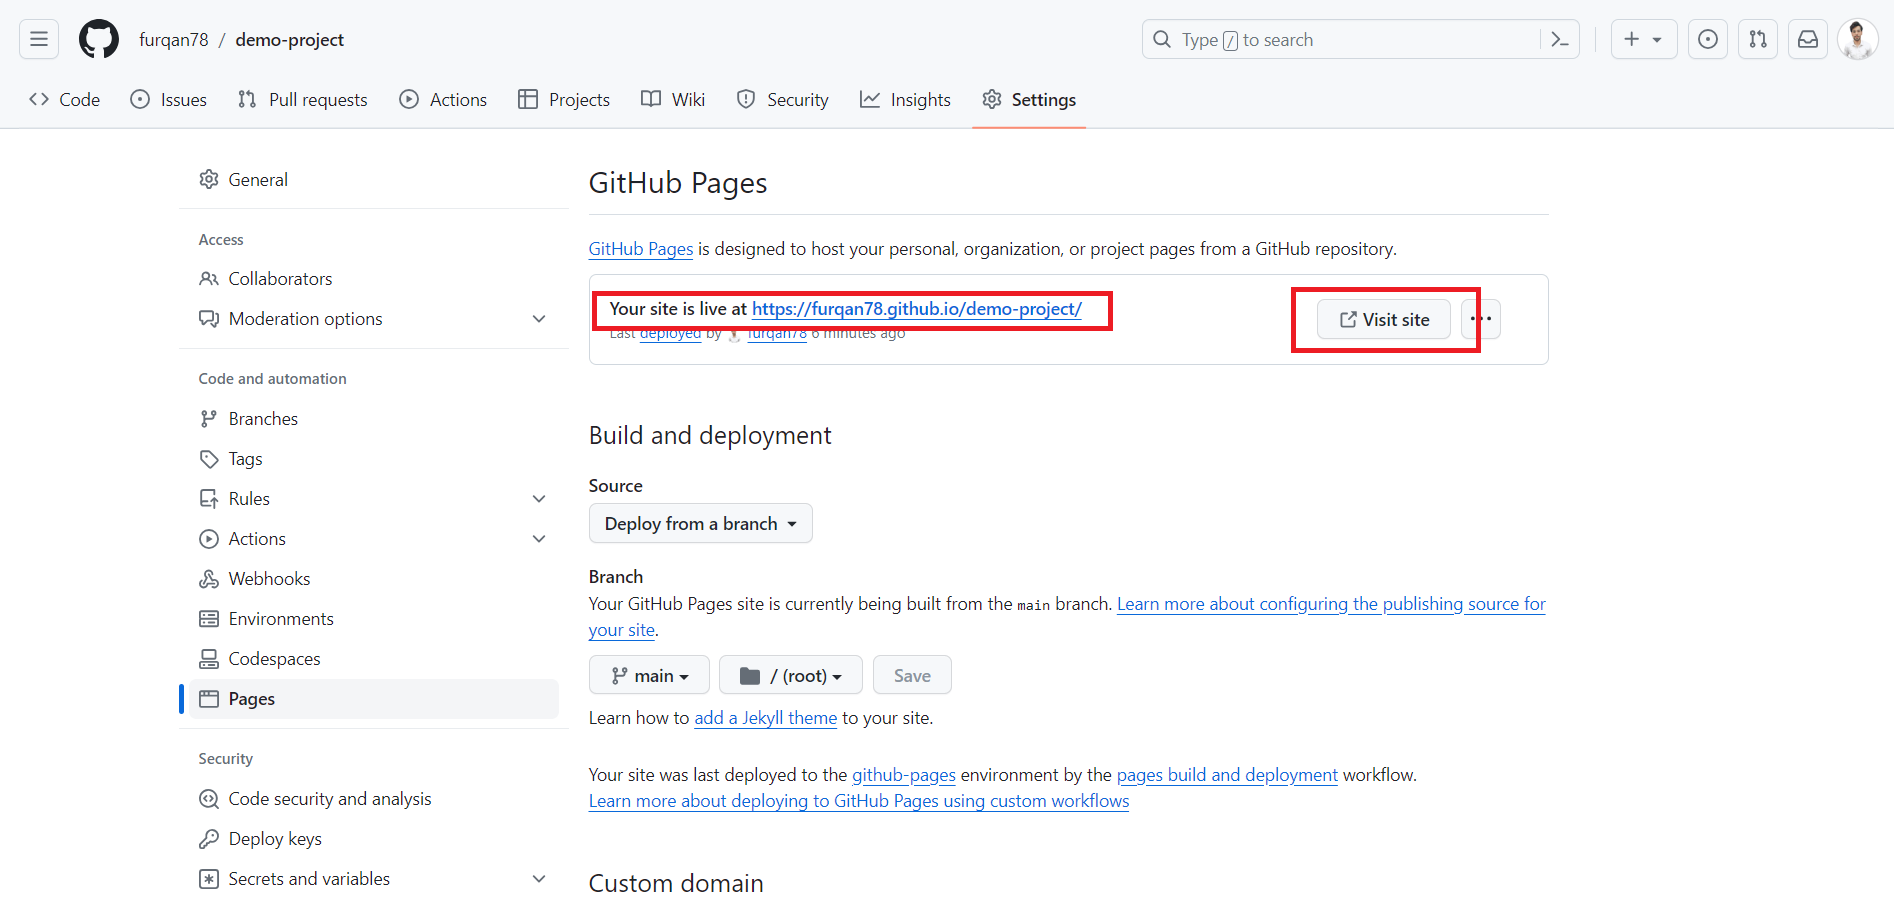
Congratulations! You've fruitfully deployed your website utilizing GitHub Pages, fully free of charge.
Deployed Website:

Conclusion
So, we can utilize GitHub Pages to deploy a website for free but ensure you can only deploy static website. You can also add custom domain URL for you deployed website to configure the domain you can refer the GitHub Pages custom domain configuration documentation.
I hope you loved this article. Stay Happy!